Irish Scones
This post may contain affiliate links. Please read my disclosure policy.


Delicious traditional Irish Scones, incredibly flaky and buttery, perfect for breakfast or brunch any time of the year. Serve them with some butter, your favorite jam and cream for an irresistible treat to enjoy with your morning cup of coffee or tea!
There’s nothing quite like a freshly baked Irish scone—buttery, flaky, and just the right amount of crumbly. I remember picking them up from a bakery, still warm from the oven, with that golden crust just begging for a smear of butter and jam. It didn’t take long before I knew I had to make them myself, and after plenty of batches, this is the one I keep coming back to. Easy, foolproof, and just like the ones I fell in love with!
Why You’ll Love These Irish Scones
- Classic & Authentic – These Irish scones have the perfect balance of buttery richness and a tender crumb, just like the ones from a traditional Irish bakery.
- Versatile – You can add whatever you wish to them. Try raisins, chocolate chips, berries, or plain! Cut them into squares, triangles or rounds!
- Simple Ingredients, Big Flavor – You probably have most of these pantry staples already. No fancy techniques, just classic baking at its best.
- Make-ahead And Freezer Friendly – Bake a batch now and enjoy later! They reheat beautifully, making them great for busy mornings.
- Perfect for Any Occasion – Whether it’s St. Patrick’s Day, a cozy brunch, or just because, these scones are always a good idea.
Before You Start – Expert Tips for Perfect Irish Scones
Making traditional Irish scones is all about simple ingredients and proper technique. Here’s everything you need to know to get bakery-quality scones at home!
Key Ingredients & What They Do

- Cold Butter is Non-Negotiable – The key to flaky scones is cold, cubed butter. When it melts during baking, it creates pockets of air, giving you that classic, tender crumb. Pro tip: Freeze your butter and grate it for even distribution!
- Heavy Cream for Richness – Unlike milk, heavy cream gives these scones a richer, more indulgent texture. Don’t substitute with regular milk—it won’t give you the same buttery softness.
- Eggs for Structure & Color – The eggs bind the dough and add richness, while the egg wash gives the scones a beautiful golden crust.
- Baking Powder for Lift – There’s a lot of baking powder here, and for good reason! It ensures these scones rise properly, creating that light, airy texture.
- Dried Currants or Raisins – Traditional Add-In – While optional, currants (or raisins) add a subtle sweetness and chewiness that’s classic in Irish scones. You can swap them for chocolate chips, orange zest, or chopped nuts if you prefer!
Mastering the Dough – Don’t Overwork It!

Keep It Cold – Warm butter = tough scones. Work quickly and handle the dough as little as possible. If it starts getting soft, chill it for 10 minutes before baking.

Mix Just Until Combined – Overmixing = dense, chewy scones. The dough should be a bit shaggy—it will come together when you pat it out.

Flour Your Surface Lightly – Too much flour can dry out your dough. Use just enough to prevent sticking when rolling it out.
Thickness Matters – 1 inch thick is the sweet spot. Anything thinner, and they’ll be more biscuit-like.
Baking Like a Pro
Use a Hot Oven – 350°F (175°C) is perfect for even baking and a golden crust.

Don’t Twist the Cutter! – When cutting out your scones, press straight down. Twisting seals the edges, preventing them from rising properly.
Spacing Matters – Place scones close together (almost touching) for soft sides, or space them apart for crispier edges. I like mine with crispier edges, so I placed mine about an inch apart.

Egg Wash for Shine – Brushing the tops with a beaten egg gives you that golden, bakery-style finish.
How to Serve
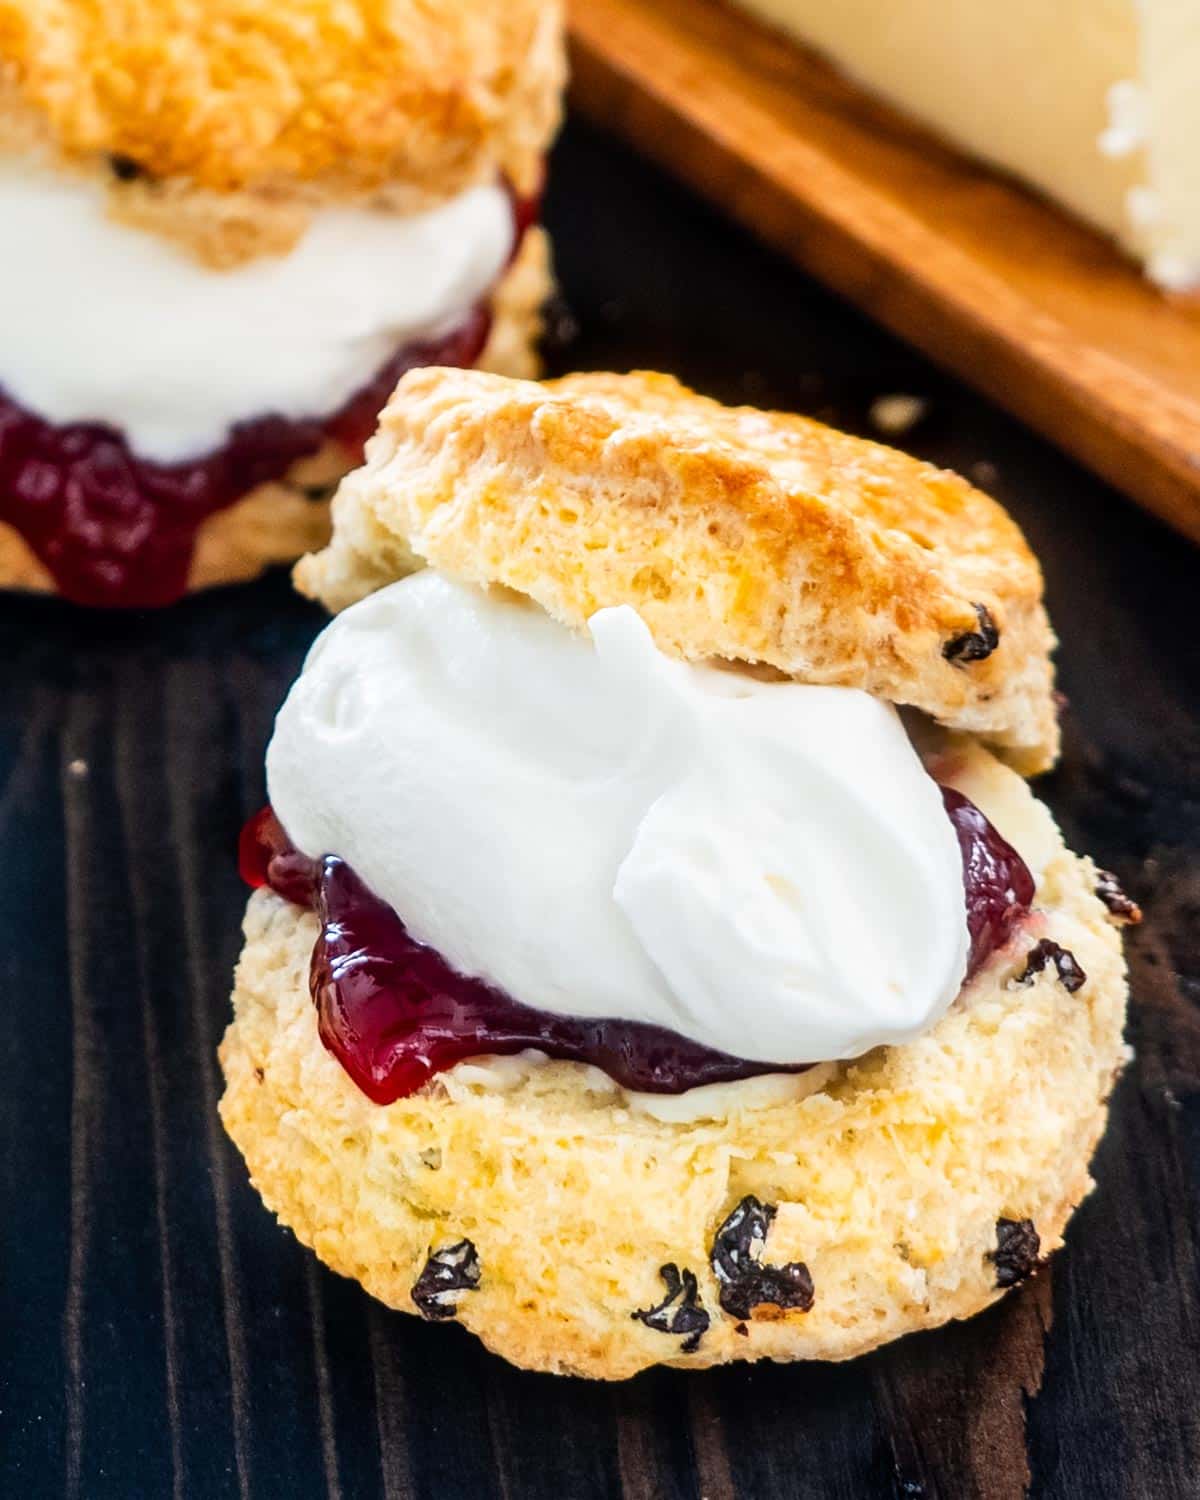
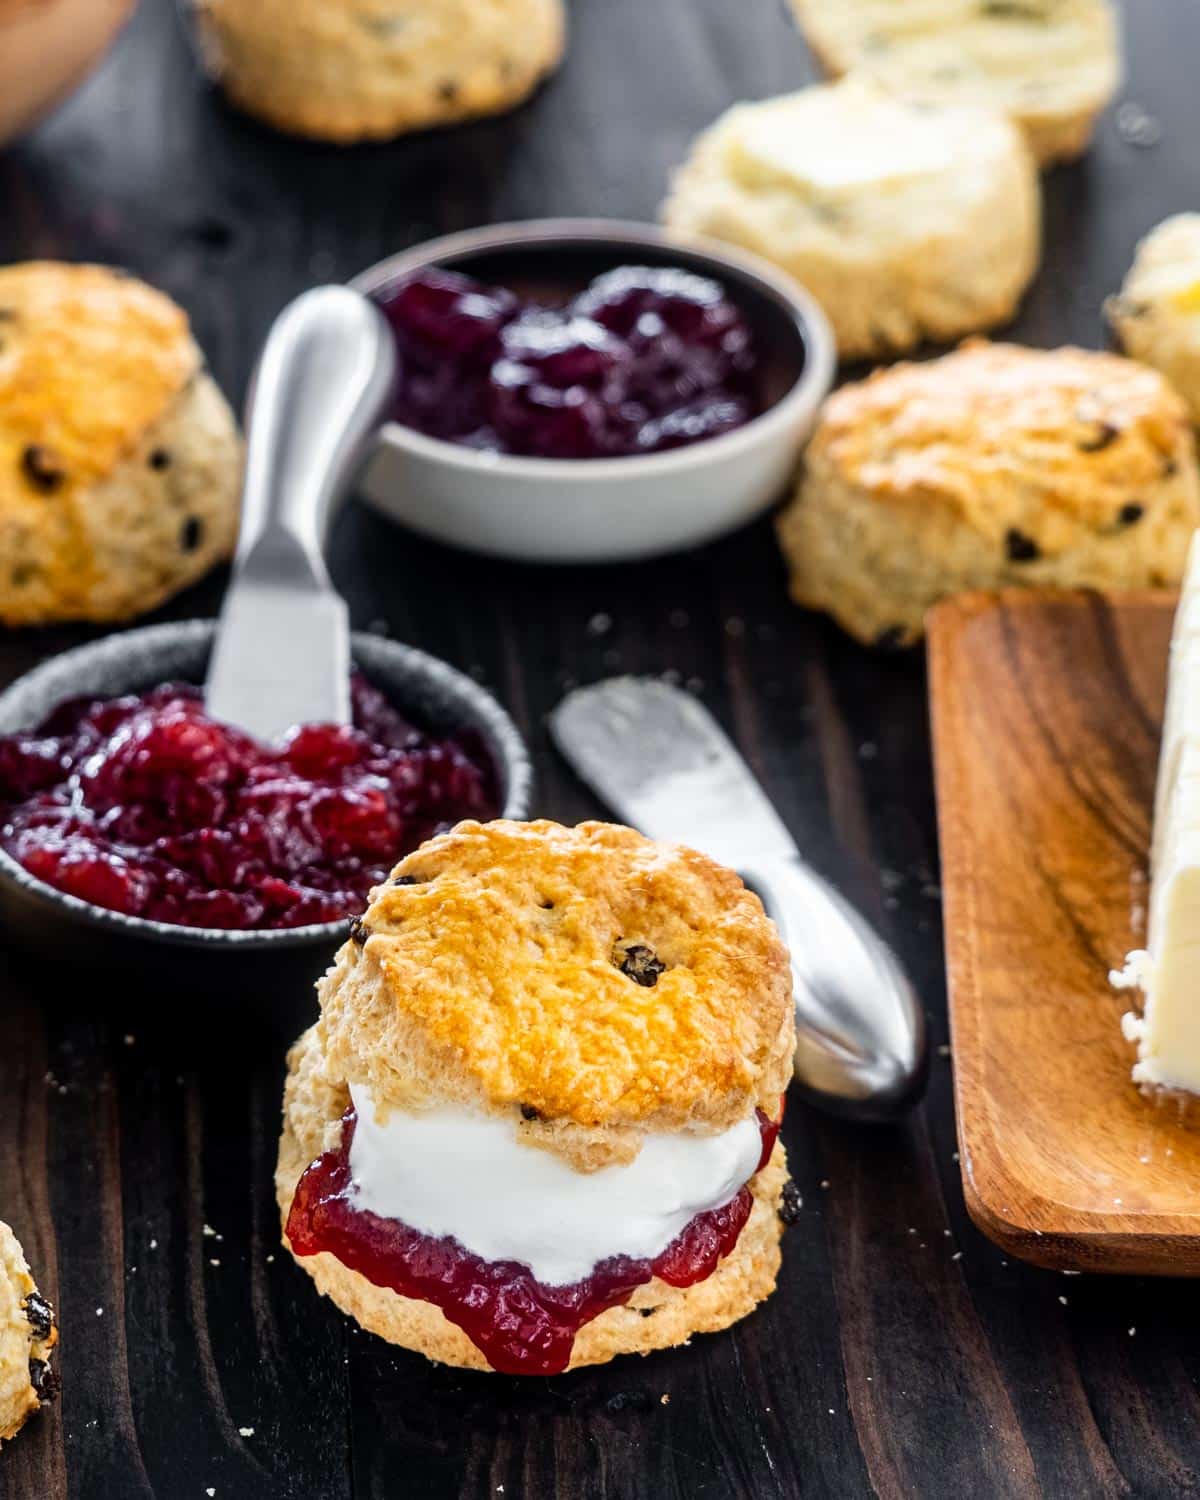
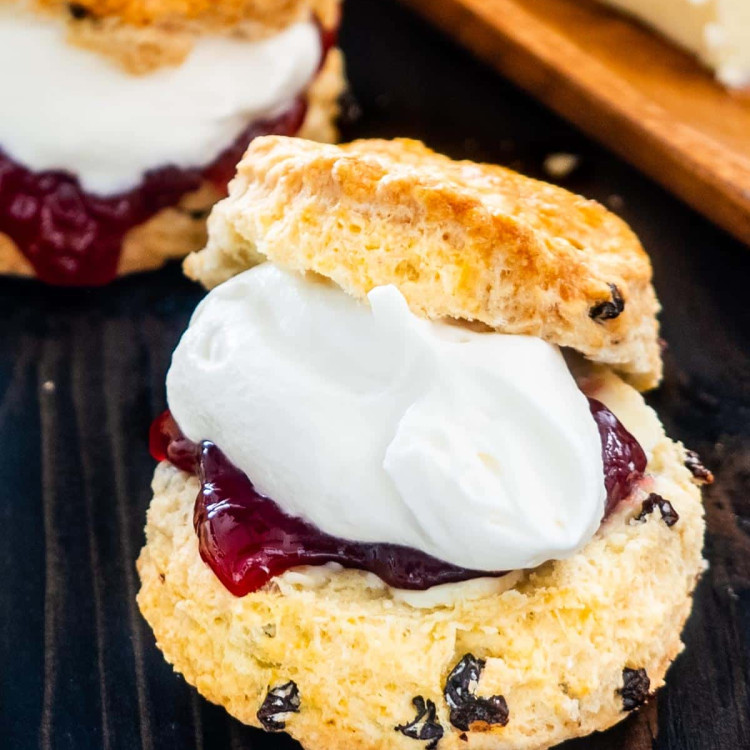
These Irish Scones are best served warm, fresh out of the oven, with a generous spread of butter, jam, and cream. Whether you’re enjoying them for breakfast, brunch, or an afternoon treat, here are some delicious ways to serve them:
- Classic Style – Spread with butter and jam, like strawberry, raspberry, or apricot.
- Clotted Cream & Jam – The ultimate pairing! Clotted cream adds richness, and jam brings a touch of sweetness.
- Honey or Maple Syrup – Drizzle over a warm scone for a naturally sweet finish.
- Savory Twist – Skip the sugar in the dough and serve with cheese and butter for a more savory option.
- With Coffee or Tea – These scones are made for dunking—a perfect companion to your morning coffee or a classic Irish breakfast tea.

Frequently Asked Questions
What makes Irish scones different from other scones?
Irish scones are flakier, less sweet, and have a denser crumb than American scones. They also use less butter and sugar, making them a more traditional, lightly sweetened baked good. Unlike American-style scones, which often have heavy glazes or mix-ins like chocolate chips, Irish scones focus on simplicity—usually served with butter, jam, and cream rather than baked-in sweetness.
Do I have to use currants or raisins? Can I leave them out?
Absolutely! Traditional Irish scones often include currants or raisins, but they’re completely optional. If you prefer plain scones, just leave them out. If you want a twist, try swapping them for dried cranberries, chopped apricots, or even a handful of mini chocolate chips for a more indulgent version.
Why is my scone dough too sticky or too dry?
The dough should be slightly sticky but not wet. If it’s too dry and crumbly, add a tablespoon of cream at a time until it comes together. If it’s too wet, dust with a little more flour. Be careful not to overwork the dough—kneading it too much will make the scones tough instead of flaky.
Can I make the dough ahead of time?
Yes! You can make the scone dough a few hours in advance and keep it covered in the refrigerator until ready to bake. If making it the night before, wrap it tightly in plastic wrap and store it in the fridge. When ready to bake, roll it out, cut the scones, and bake as directed.
How do I store leftover scones?
Freshly baked scones are best enjoyed the same day, but if you have leftovers:
At Room Temperature – Store in an airtight container for up to 2 days.
In the Refrigerator – Keep in an airtight container for up to 5 days. Warm them slightly before serving.
In the Freezer – Place cooled scones in a freezer-safe bag or container and freeze for up to 3 months. When ready to eat, thaw at room temperature or warm in the oven at 300°F for 5-10 minutes.
Can I freeze unbaked scones?
Yes! To freeze before baking, cut out the scone shapes and place them on a parchment-lined baking sheet. Freeze until solid, then transfer them to a freezer-safe bag. When ready to bake, bake directly from frozen, adding a couple of extra minutes to the baking time.
Why do my scones not rise properly?
If your scones aren’t rising as much as you’d like, here are a few possible reasons:
Overworked Dough – Handle it gently to keep the butter from melting before baking.
Baking Powder Issues – Make sure your baking powder is fresh. Old baking powder won’t give the right lift.
Oven Temperature – Make sure your oven is fully preheated before baking.
Can I make these scones gluten-free?
Yes, you can! Use a 1:1 gluten-free flour blend that includes xanthan gum for structure. The texture may be slightly different, but they will still be delicious.
More Delicious Irish Recipes
- Irish Potato Cakes (Potato Farls)
- Corned Beef And Cabbage
- Skillet Shepherd’s Pie
- Colcannon
- Irish Soda Bread
- Dublin Coddle
Before You Begin! If you make this, please leave a review and rating letting us know how you liked this recipe! This helps our business thrive & continue providing free recipes.
Irish Scones
Ingredients
- 4 cups all-purpose flour
- 3 tablespoons sugar
- 2 tablespoons baking powder
- 1 tablespoon salt
- ½ cup cold butter (unsalted, cut into cubes)
- ¾ cup dried currants (or raisins)
- 4 large eggs (beaten)
- 1 cup heavy cream
- 1 egg (beat for egg wash)
Before You Begin! If you make this, please leave a review and rating letting us know how you liked this recipe! This helps our business thrive & continue providing free recipes.
Instructions
- Preheat the oven to 350°F.
- In a large bowl add the flour, sugar, baking powder, salt and mix until combined.
- Add the cubed butter and using a pastry cutter blend until it resembles breadcrumbs. If you don't have a pastry cutter, you can use two knives. Mix in the dried currants or raisins, if adding.
- Whisk together the eggs with the heavy cream in a large measuring cup.
- Slowly pour the liquid into the bowl with the dry ingredients and using a spatula start mixing the dough together. Don't over-mix, add just enough liquid until the dough starts forming. Transfer the dough onto a floured work surface.
- Knead the dough lightly then press it down into a smooth surface, using your hands or use a rolling pin, until it's about 1 inch in thickness.
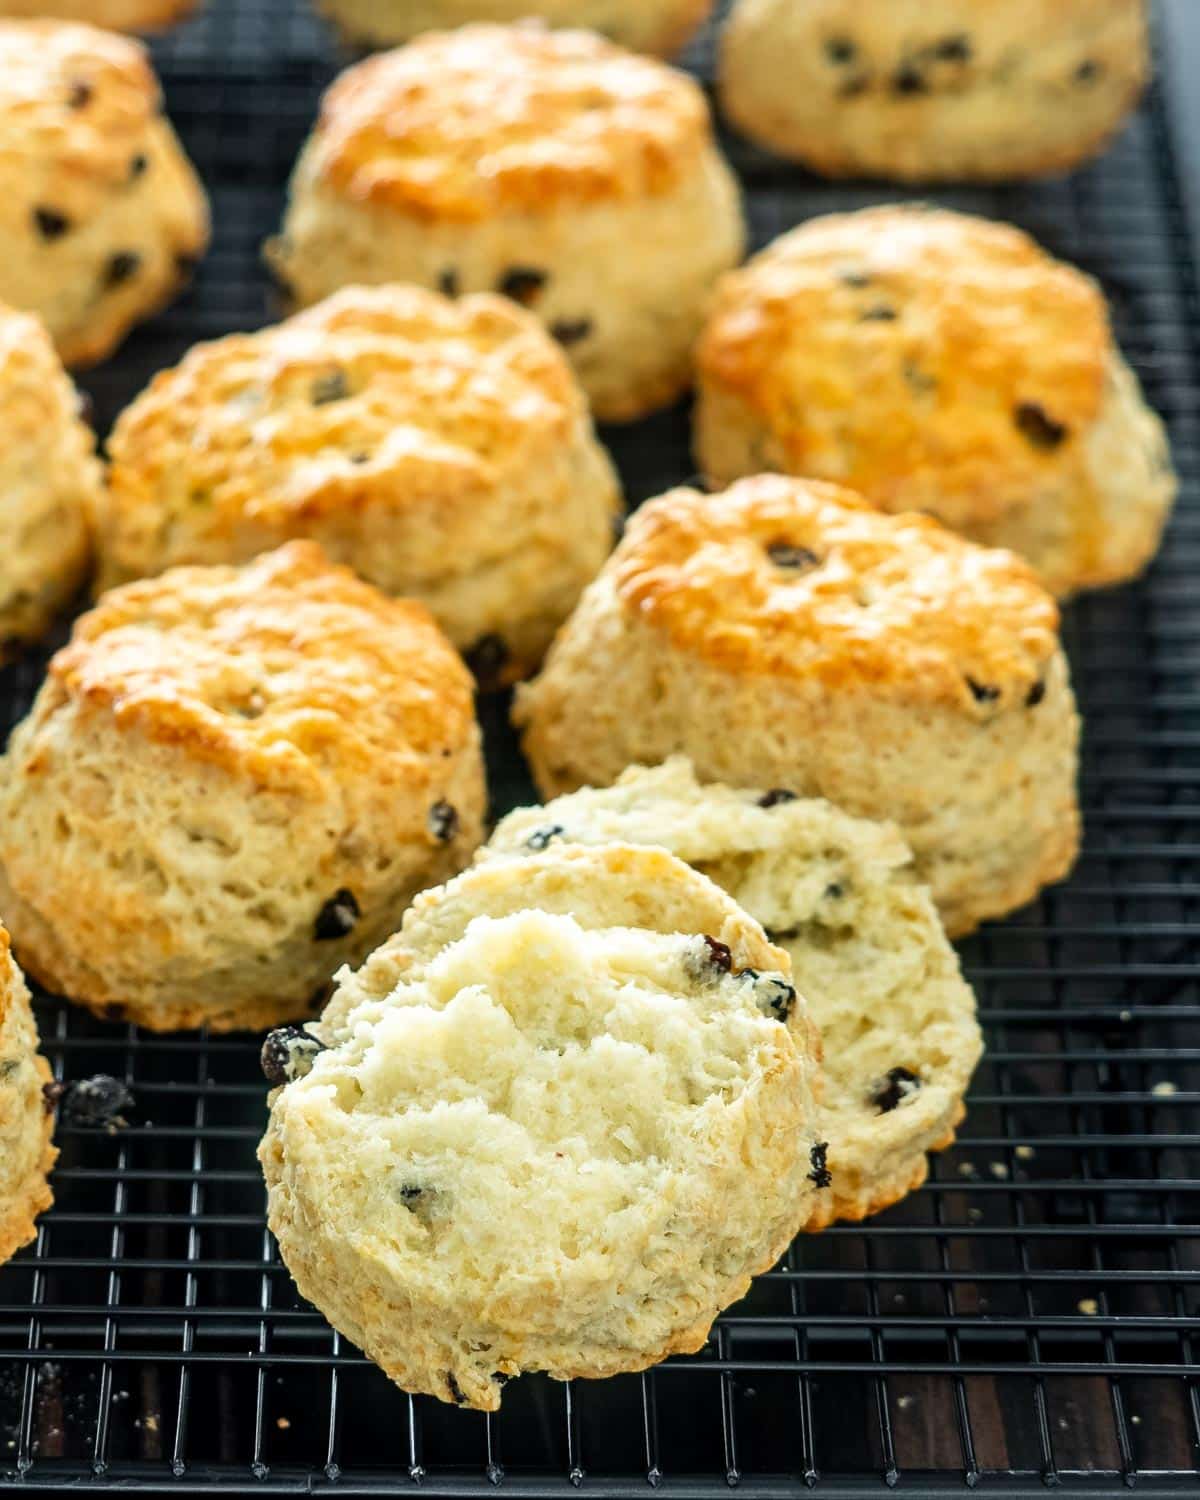
- Using a round 3-inch scone cutter, cut the dough into 12 to 16 scones. I was able to get 16 scones from the dough. Place scones onto a baking sheet. Re-roll any leftover dough and cut into scones. Brush the scones with beaten egg.
- Transfer the baking sheet to the oven and bake for 18-22 minutes or until golden brown. Cool scones on a cooling rack.
- Serve with butter, jam and freshly clotted cream.
Equipment
Notes
- Cold Butter Is Key. Cold butter is your secret to super flaky scones. Freeze your butter before using for about 30 minutes before adding it to the flour mixture.
- No Pastry Cutter? No Problem! Use a box grater to grate the butter right into your flour mixture, then just mix everything together.
- Do Not Over-mix The Dough. I know I always say this, but this is really important because too much kneading/stirring and you’ll end up with dense scones instead of light, fluffy scones.
- Don’t Add Too Much Liquid. Add just enough cream/egg mixture until the dough sticks together, otherwise your scones could come out tough.
- Make Ahead & Freeze – These scones freeze beautifully! Freeze them baked or unbaked (see FAQ for details). Perfect for a quick treat anytime.
- If adding frozen fruits or berries, add them at the last minute, right before cutting the scones to prevent its juices from melting.
Nutrition Information
Notice: Nutrition is auto-calculated for your convenience. Where relevant, we recommend using your own nutrition calculations.
