Crispy Oven-Baked Pork Carnitas
This post may contain affiliate links. Please read my disclosure policy.

These Pork Carnitas are the real deal, fall-apart tender, crispy on the edges, and packed with flavor. If you’ve been looking for the ultimate carnitas for tacos, burritos, or just eating straight off the tray (no judgment), this is it.

I’ve made carnitas every way you can think of, slow cooker, stovetop, oven, and let’s be real: some of those versions were fine, but fine doesn’t cut it when you’re chasing carnitas greatness. This oven-baked method gives you juicy, fall-apart pork with crispy edges that’ll make you wonder why you ever settled for takeout. I’ve tested (and retested) this until it was foolproof, so you don’t have to. If you think homemade can’t beat restaurant carnitas, just wait until you smell your kitchen.
Why You’ll Love These Pork Carnitas
- Crispy AND juicy. You get those crispy golden edges and ridiculously juicy pork in every single bite, no sad, dry carnitas here.
- Tried, tested, and foolproof. I’ve cooked carnitas every which way, this oven-baked method is the one I stand behind 100%. No guesswork, just perfect results.
- Simple ingredients, big flavor. A pork shoulder, some citrus, a handful of spices, nothing fancy, but the flavor hits like you spent all day working on it.
- Make once, eat all week. Tacos, burritos, sandwiches, nachos, carnitas are basically meal prep’s cooler, better-looking cousin.
- Better than takeout. Save your money. Once you make these at home, the restaurant versions will taste like a sad second choice.


Before You Start: Tips & Ingredient Notes
- Pork shoulder is non-negotiable: Look for pork shoulder (also called pork butt). It’s got the perfect fat content for juicy, shreddable carnitas. Lean cuts like loin? Forget it, you’ll just end up sad and dry.
- Cut into chunks to save time: Short on time? Cut the pork shoulder into large chunks, it shaves almost an hour off the cook time without sacrificing flavor.
- Season generously: Pork shoulder is a big, bold cut, it can take a lot of seasoning. Don’t be shy. Under-seasoned carnitas are just pulled pork wearing disappointment.
- Keep the citrus halves: After you juice the oranges and limes, toss the spent halves right into the pot. They add way more flavor than just the juice alone. Trust me, don’t skip them.
- Low and slow is the secret: You can’t rush greatness. Baking at a low temp melts all that connective tissue, making the pork melt-in-your-mouth tender. Cranking the heat? Big mistake, huge.
- Broiling = magic: Crispy edges are what separate carnitas from regular pulled pork. Don’t skip the broiling step unless you enjoy disappointment.
- Save the cooking liquid: After shredding, ladle some of that liquid back over the meat before broiling. It keeps the pork juicy while you crisp it up, basically, it’s free flavor insurance.

Preheat your oven to 300℉. In a small bowl, combine 1½ teaspoons salt, ¾ teaspoon black pepper, 1 teaspoon ground cumin, 1 teaspoon red pepper flakes, and 1 teaspoon dried oregano. It’s simple but mighty, don’t overthink it.

Place a 4-pound boneless pork shoulder in a large Dutch oven. Rub the dry rub all over the pork on all sides. Throw in 1 peeled and halved onion, 3 crushed garlic cloves, juice from 2 medium oranges and 2 limes, along with the spent orange and lime halves.

Cover the pot and bake for 3½ hours. No peeking. No poking. Just let the pork do its thing and get beautifully tender.

Transfer the pork to a large baking sheet and shred it with two forks. It should fall apart like it’s showing off. Ladle about 1 cup of the liquid left in the pot all over the shredded pork. This keeps it juicy when you crisp it up, don’t skip this or you’ll regret it.

Pop the shredded pork under the broiler for 5–10 minutes. Halfway through, toss it around with a spatula so it gets crispy on all sides. If you want it extra crispy (no judgment), broil it again for a few more minutes.

Serve and Conquer
Pile it into tacos, stuff it into burritos, throw it on nachos, or just eat it straight off the tray like the carnitas legend you are. Here are some great ideas:

3 Ingredient Mexican Rice
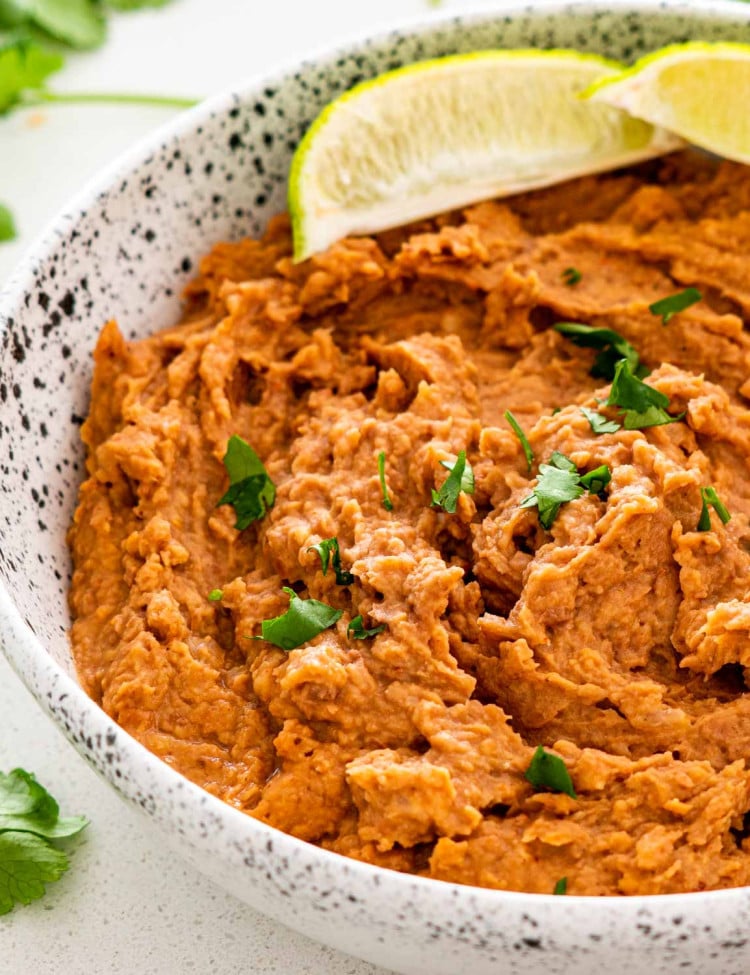
Refried Beans
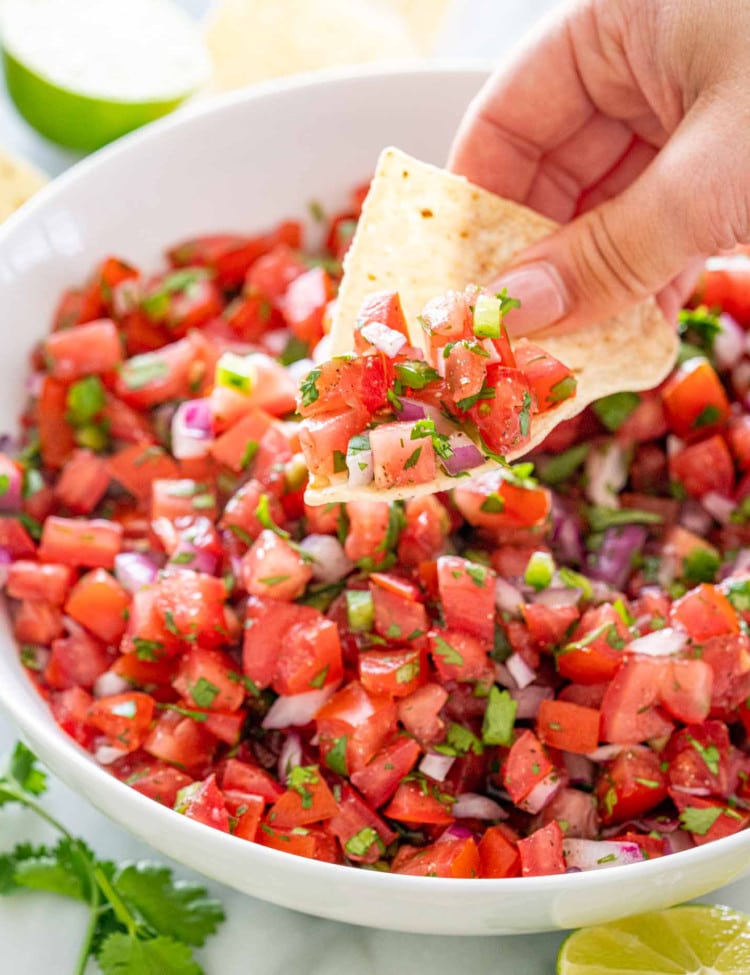
Pico de Gallo Recipe
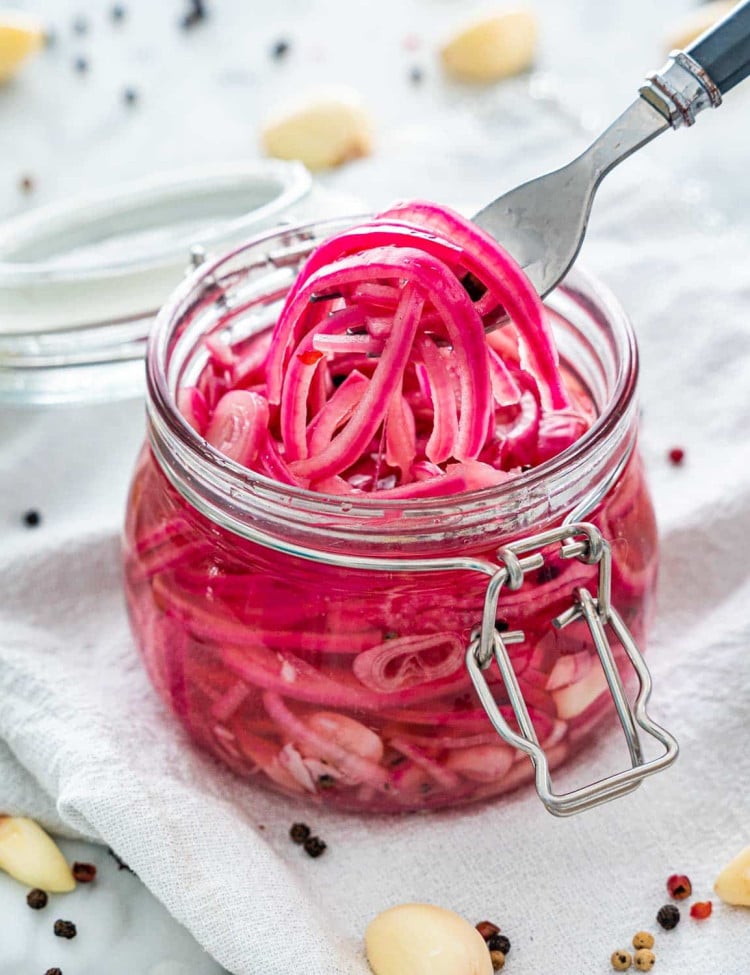
Pickled Red Onions
Frequently Asked Questions
What are carnitas?
Carnitas are a traditional Mexican dish made of slow-cooked pork that is shredded and often crisped up in the oven or on the stovetop. The word “carnitas” means “little meats,” and the dish is known for its tender, flavorful, and slightly crispy texture.
What’s the best cut of meat for carnitas?
Pork shoulder (also called pork butt) is hands-down the best cut. It’s marbled with just the right amount of fat to keep the meat juicy while it slow-cooks and crisps up. Don’t try to swap in lean cuts like pork loin, they’ll dry out and break your carnitas-loving heart.
Can I make carnitas in the Instant Pot?
Yes! Pressure cook on high for about 90 minutes, natural release, then shred and broil like usual. Instant Pot is faster, but you’ll miss out on a little oven-roasted flavor. (Still totally worth it if you’re short on time.)
Can I use a slow cooker instead?
Absolutely. Throw everything into your slow cooker and cook on low for 8–10 hours. You’ll still need to broil the pork after shredding to get those essential crispy bits, otherwise, it’s just pulled pork and we’re aiming higher than that. For detailed instructions, check out the recipe on my blog here.
Can I crisp carnitas without broiling?
Yep! You can toss the shredded pork into a hot cast iron skillet and let it sizzle until the edges get those gorgeous crispy bits. It’s a little more hands-on than broiling, but if you love standing over a stove flipping pork like a pro, this method’s for you.
Can I make carnitas ahead for a party?
Totally. In fact, they’re even better made ahead! Slow cook and shred the pork the day before, refrigerate it, then crisp it up right before serving. Your guests will think you’ve been working all day when really, you’re just casually pulling magic out of the oven.
How do I store leftover pork carnitas?
Store leftover pork carnitas in an airtight container in the refrigerator for 3 to 4 days. Reheat them gently in a skillet or in the oven until heated through.
Can I freeze carnitas?
Yes, and you should if you have leftovers. Let them cool, then freeze flat in freezer bags. They’ll last 4–6 months. Reheat from frozen by spreading them on a sheet pan and baking at 400℉ until hot and crispy again.
What’s the best way to reheat carnitas?
Oven is king. 400℉ for about 15–20 minutes will bring them right back to life, juicy inside, crispy outside. Microwave works if you’re desperate, but you’ll lose the crispy magic.
Why do I need to keep the citrus halves?
Because that extra flavor from the peels and pulp gives the pork way more depth. Juice alone just doesn’t cut it. Trust me on this one, it’s not optional.

Try These Mexican Recipes Next
- Chicken Fajitas
- 3 Ingredient Mexican Rice
- Mexican Street Corn Salad
- Mexican Chicken Egg Rolls
- Breakfast Burritos
- Carne Asada
- Barbacoa
- Refried Beans
- Pozole Rojo Recipe
Before You Begin! If you make this, please leave a review and rating letting us know how you liked this recipe! This helps our business thrive & continue providing free recipes.

Crispy Oven-Baked Pork Carnitas
Video
Ingredients
- 4 pound pork shoulder ((aka pork butt), bonless)
- 1 onion (peeled and halved)
- 3 cloves garlic (crushed)
- 2 medium oranges (juiced and keep the spent halves)
- 2 limes (juiced and keep the spent halves)
Dry Rub
- 1½ teaspoon salt
- ¾ teaspoon black pepper
- 1 teaspoon cumin (ground)
- 1 teaspoon red pepper flakes
- 1 teaspoon oregano (dried)
Before You Begin! If you make this, please leave a review and rating letting us know how you liked this recipe! This helps our business thrive & continue providing free recipes.
Instructions
- Preheat the oven to 300℉.
- In a small bowl, combine all the dry rub ingredients together.

- Place the pork shoulder in a large Dutch oven or an oven safe pot and rub the dry rub all over the pork on all sides. Throw in the onion, garlic juice from the oranges, limes and the spent orange and lime halves.
- Cover the pot and place it in the oven. Bake for 3½ hours until the meat is tender and shreddable.

- Remove the meat from the pot and place it on a baking sheet. Using two forks shred the meat into small pieces. There should be about 1½ cups of liquid left in the pot. Ladle about 1 cup of that liquid all over the shredded pork.
- Place the meat under the broiler, for about 5 to 10 minutes. Half way through turn them over with a spatula to crisp up on both sides. You can crisp them up 450℉ for about 30 minutes, especially if your oven doesn’t have a broiler.
- Serve hot on tortillas, burritos, tamales, sandwiches, etc.


Equipment
Notes
- Pork shoulder: Stick with pork shoulder (also called pork butt) for the best results. It’s the ideal cut for juicy, tender carnitas with crispy edges.
- Cutting time: Short on time? Cut the pork into 4-inch chunks before baking — it’ll shave about an hour off the cooking time.
- Save the cooking liquid: After shredding, ladle some of the flavorful liquid over the pork before broiling to keep everything juicy and loaded with flavor.
- Storage: Leftovers keep in the fridge for 3–4 days or freeze beautifully for up to 6 months. Reheat in a hot oven (400℉) until crispy and delicious again.
- Extra crispy? No problem. Broil them a little longer or pop them back in the oven for a few extra minutes.
Nutrition Information
Notice: Nutrition is auto-calculated for your convenience. Where relevant, we recommend using your own nutrition calculations.
