Homemade Crepes – Just Like My Mom Taught Me
This post may contain affiliate links. Please read my disclosure policy.

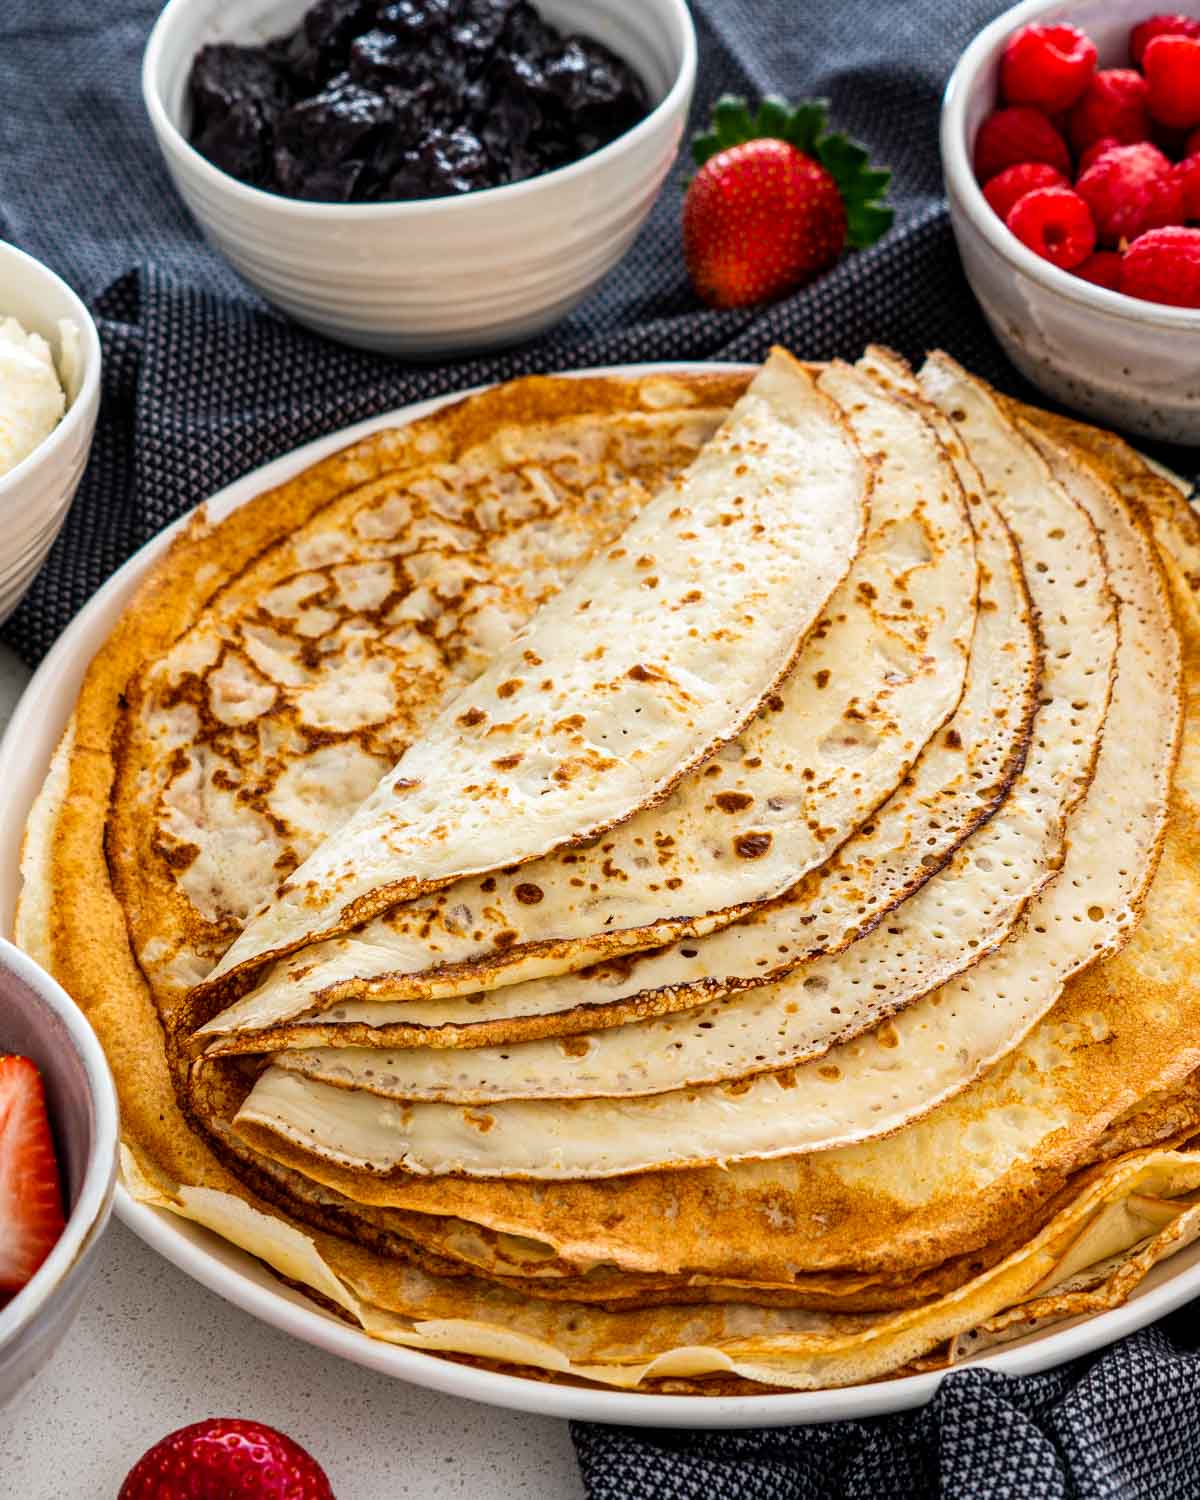
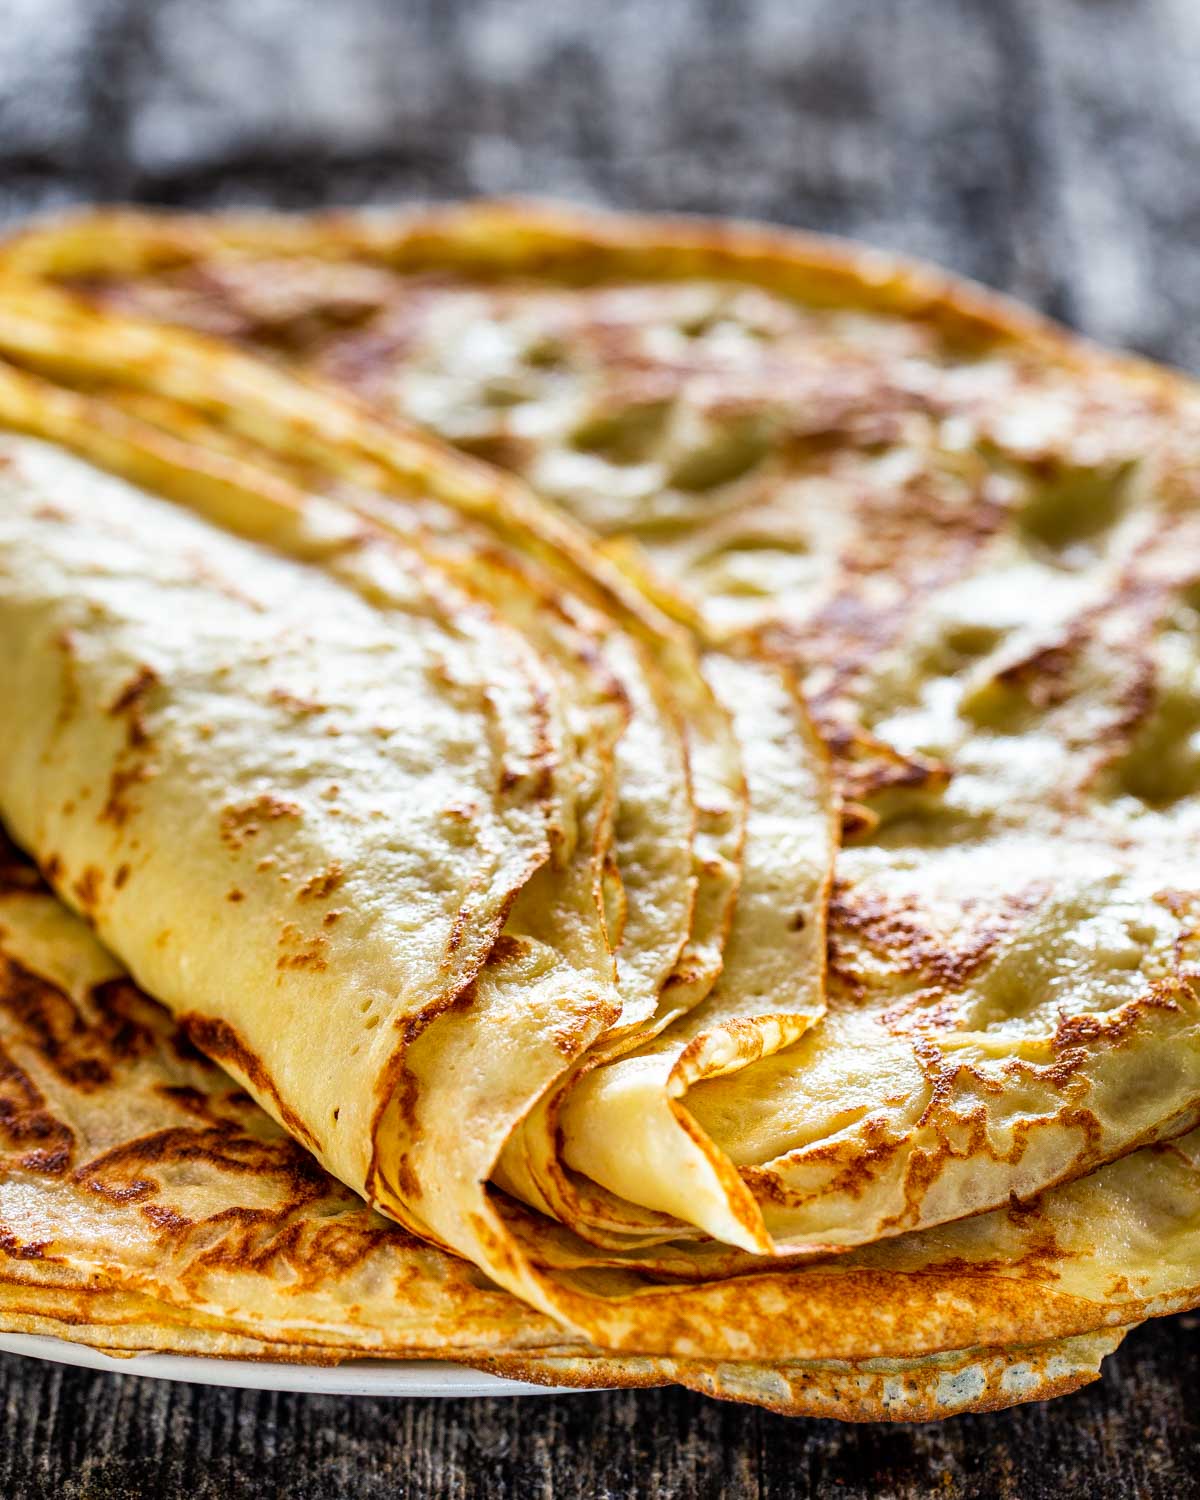
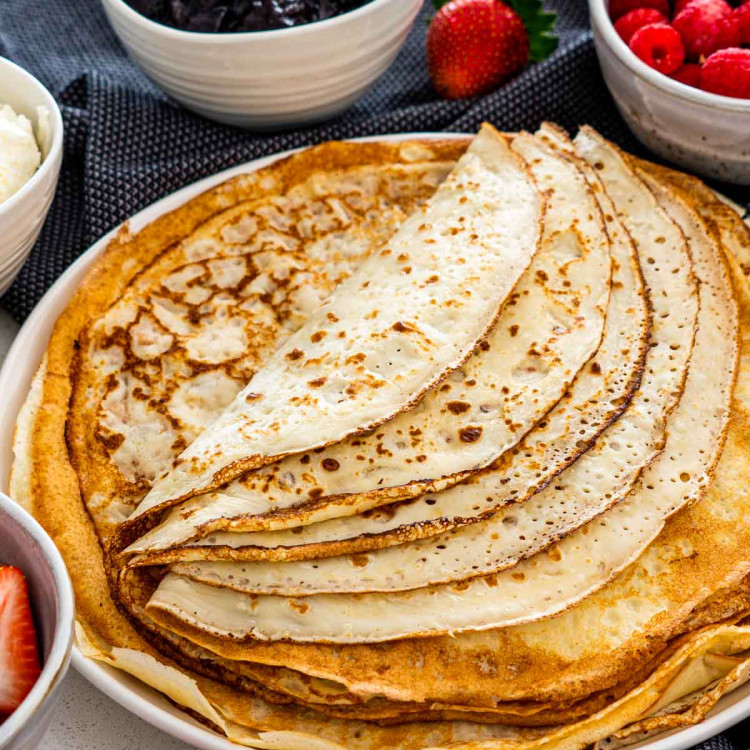
Homemade Crepes – thin, golden, buttery-soft pancakes that taste like Sunday afternoons at home, plus, zero flipping drama once you get the hang of it.
If there’s one recipe that brings me straight back to my childhood kitchen, it’s this one. These homemade crepes, or clătite, as we called them, were our every Sunday ritual. My mom would make a big batch, I’d sneak the first one (always the “ugly” one), and the house would smell like warm vanilla and sugar for hours.
It was the first thing she ever taught me to make, standing over the stove with her while she patiently explained the swirl-and-flip routine like it was a sacred dance. And honestly? It kind of is.
We didn’t do anything fancy, just a bit of jam, rolled tight, eaten while still warm. And that’s still how I like them best. Though if Nutella happens to fall in, well, I won’t fight it.

Why I Love These Crepes
- They remind me of home, Sunday afternoons, lots of chatter with my mom and sister, and jam-sticky fingers.
- It was the first recipe I ever nailed (with my mom hovering, obviously).
- The batter is simple and forgiving, no stress, no drama.
- You can roll them, fold them, stuff them, or just eat them plain over the sink. I’ve done all of the above.
- They taste like comfort, soft, buttery, and just sweet enough.
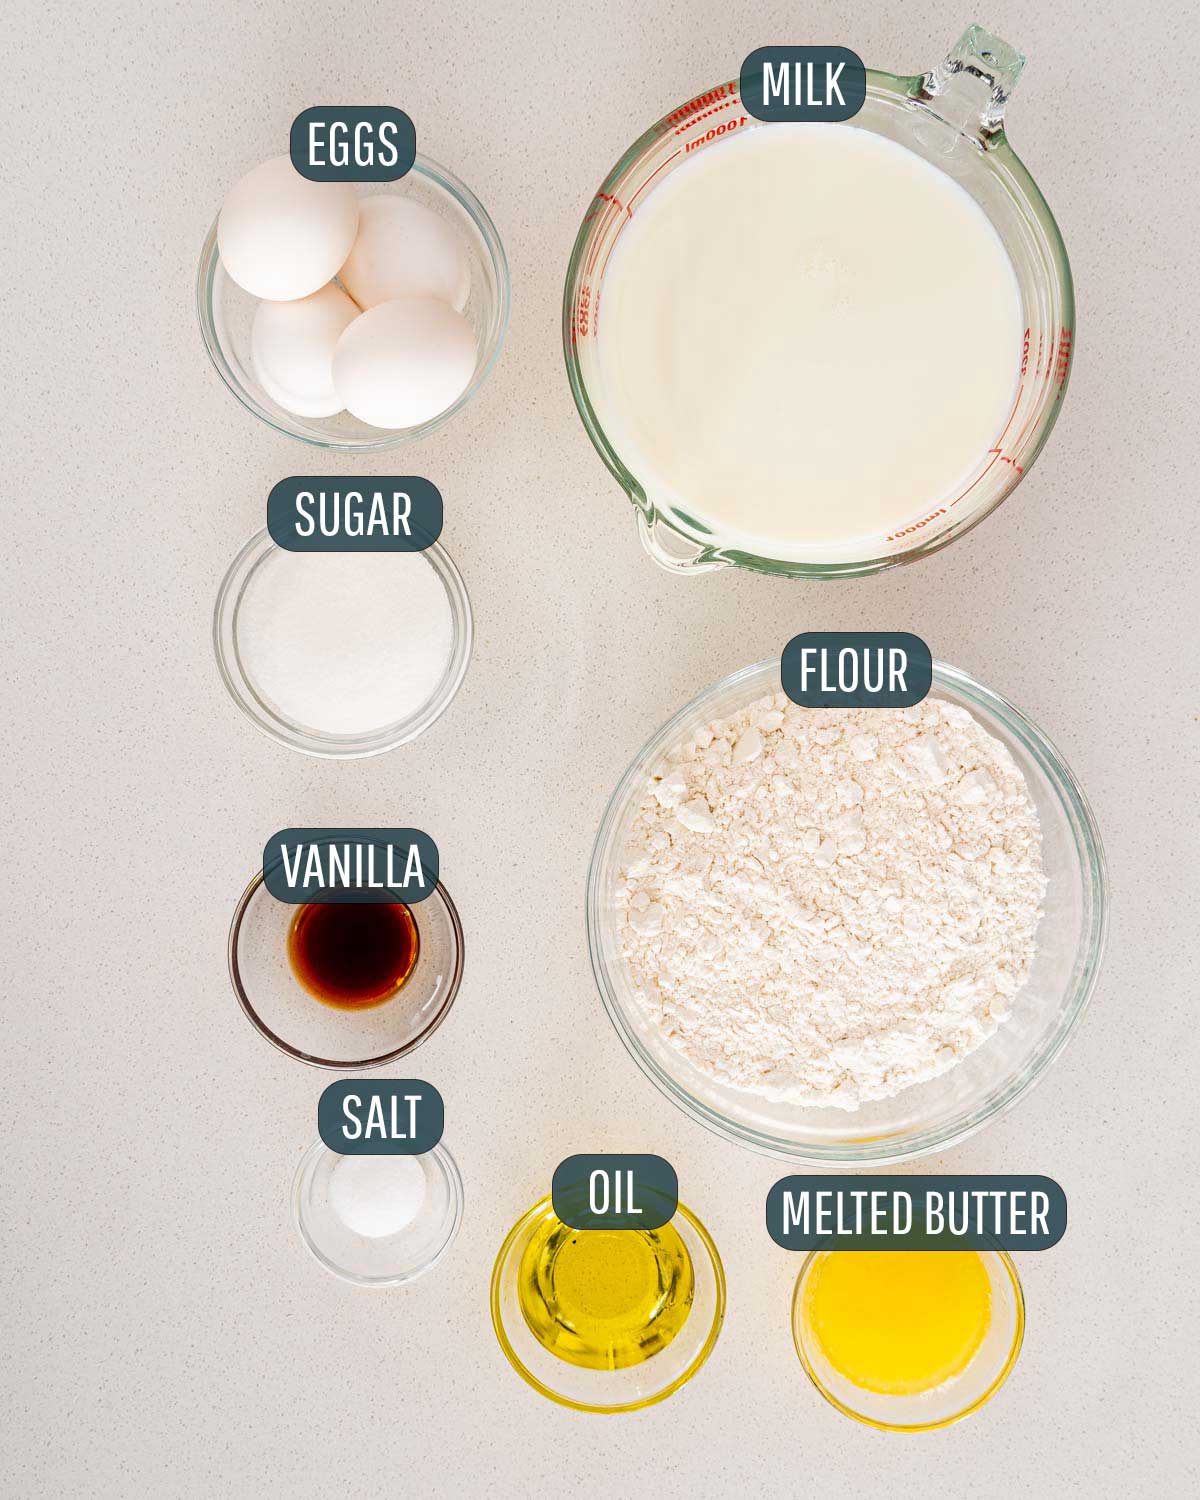
- Start with pantry staples. Flour, eggs, sugar, milk, vanilla, salt. Nothing fancy here. If you’ve got butter and a non-stick pan, you’re basically set.
- Batter should be thin, not pancake-thick. Crepe batter should pour like heavy cream. If it feels too thick, add a splash more milk. It should spread easily when you swirl the pan.
- Let the batter rest. I know, I know, but 20–30 minutes of rest time makes the crepes softer and easier to flip. I usually let mine sit while I clean the kitchen. Or scroll Instagram.
- Don’t panic about the first crepe. The first one’s always a little weird. Blotchy, maybe too thick, possibly sacrificed to the crepe gods. It’s fine. That’s the warm-up round.
- You don’t need a crepe pan. I didn’t use one for years. A regular non-stick frying pan works just fine. Swirl, don’t overthink it, and trust that your flip game will get better.
- Pro move? Make a double batch. Because if you think you’ll stop at one, you won’t.

Toss everything into a blender, flour, eggs, sugar, vanilla, salt, milk, melted butter, and blend until smooth. That’s it. No lumps, no fuss. Let it rest for 20–30 minutes (or longer in the fridge if you’re planning ahead).
Use a non-stick pan or crepe pan if you’ve got one. Medium-high heat, lightly greased. It needs to be hot enough that the batter sizzles when it hits, but not so hot it browns in two seconds.
Pour in about ¾ of a ladleful (or whatever covers the bottom in a thin layer), and swirl the pan to spread it. Cook 1–2 minutes until the edges lift easily, then flip and cook another 30 seconds to a minute.
Transfer to a plate and cover with a clean kitchen towel to keep warm while you make the rest. In theory. In practice, we used to steal them straight from the stack as fast as we cooked them, my mom yelling at us to “just wait until they’re all done!” while we pretended we couldn’t hear her, jam already smeared on our fingers.

We kept it simple growing up, jam, rolled tight. These days I’ll throw in Nutella, ricotta, berries, or just a sprinkle of powdered sugar. But honestly? Nothing beats that warm jam version straight from my childhood.
Note: You could use a crepe pan. I’ve only recently started using a crepe pan because my hubby bought me one. Up until now I’ve just been using a regular frying pan!
How To Serve These Crepes
This is where the fun begins, crepes are a blank canvas for whatever you’re craving. Here’s how I love to serve them (and how we did it growing up):
- Classic with jam: My childhood favorite. Any jam works, but sour cherry or apricot hits different.
- Nutella + sliced bananas: The grown-up, indulgent version. Also, no judgment if you skip the fruit.
- Ricotta + honey + berries: Light, slightly fancy, but still low effort.
- Dusted with powdered sugar: The lazy Sunday option. Quick, cozy, and perfect with coffee.
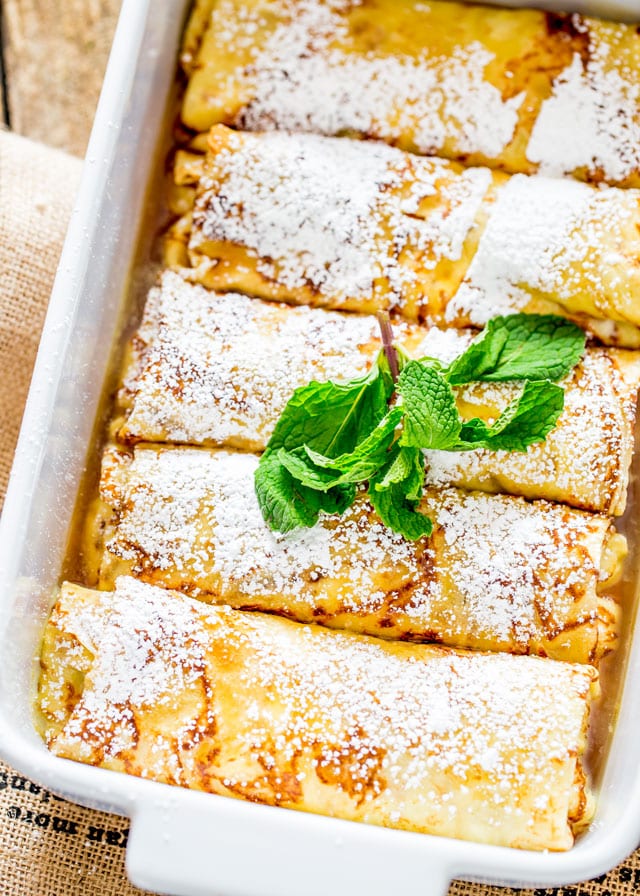
- Rolled and baked with fruit filling: Try them filled and baked like my Jelly Filled Rolls for a cozy brunch upgrade.
- With whipped cream + berry compote: Basically a fancy pancake stack, and every bit as good.
And hey, if you’re going full dessert mode, pair them with these:

Magic Cake
Maple Ricotta Stuffed Crepes


Chocolate Espresso Rolls

Frequently Asked Questions
How do I know when to flip?
Watch the edges, they’ll start to look dry and lift slightly from the pan. The crepe should also slide easily when you give the pan a shake. That’s your cue to flip.
What if my batter is too thick?
Add a splash of milk or water until it’s the consistency of heavy cream. It should spread easily when you tilt the pan.
Can I make these ahead of time?
Yes! Store them stacked and wrapped in the fridge for up to 5 days. Reheat gently in a pan or microwave.
Can I freeze crepes?
Absolutely. Layer them between sheets of parchment, seal in a freezer bag, and freeze for up to 2 months. Thaw in the fridge and reheat.
Do I need a crepe pan?
Nope. I used a regular non-stick frying pan for years. It’s all about that swirl technique and a hot pan.
Try These Recipes Next
Before You Begin! If you make this, please leave a review and rating letting us know how you liked this recipe! This helps our business thrive & continue providing free recipes.
Homemade Crepes
Video
Ingredients
- 2 eggs
- 2 tablespoon sugar
- 1 teaspoon vanilla extract
- ¼ teaspoon salt
- 2 cups milk
- 1 cup all-purpose flour
- 1 tablespoon butter (unsalted, melted)
- vegetable oil ( for frying, if needed)
Before You Begin! If you make this, please leave a review and rating letting us know how you liked this recipe! This helps our business thrive & continue providing free recipes.
Instructions
- Mix all the ingredients in a mixer or a blender really well and let sit for a few minutes.
- In the meantime heat a non stick frying pan with a ½ tsp of oil really well or spray is generously with cooking spray. It is very important that the pan is very hot.
- Pour ¾ of a ladle of the crepe mixture, or more depending on your pan size, into the pan and spread the mixture to cover the entire pan, by rotating the pan. Leave about 1 to 2 min per side then flip over or until you see the edges of the crepe starting to brown a little bit. Once the crepe is done on one side, you will also be able to slide it around and flip it over.
- Repeat steps until you've prepared all the crepes. When you're done, use your favorite jam and spread about a tsp of jam per crepe, then roll the crepe and enjoy!
Equipment
Notes
- This recipe will yield approximately 8 crepes.
- I also make these quite often with lactose free milk, and they turn out just as great.
- I’ve found that a blender is much better to get that perfect consistency for crepe batter. You can also use a whisk and whisk it all by hand, but if you have a blender, use it.
- Always let your batter rest for a few minutes in order to produce light and delicate crepes. I usually wait about half hour before starting to make them. If you plan ahead, you can even refrigerate it overnight.
- The best ratio to use is this: 2 cups milk, 1 cup flour, 2 eggs, 2 tablespoons sugar. That’s the easiest way to remember! For every cup of flour you need 2 cups of milk, 2 tablespoons of sugar and 2 eggs. Super easy, no fail recipe that works every single time!
- If at first you don’t succeed, try again! Practice really is key when making crepes. The best way to learn how to make crepes is to keep on making them. The first try is always the hardest, so don’t give up if the first one breaks! By the time you use up all the batter, you will have it mastered. The next thing you’ll know is you’ll be flipping crepes like a pro!
- Both non-stick frying pans and crepe pans will work for this recipe.
- Place your cooked, cooled crepes in a stack on a plate, wrapped tightly with plastic wrap and refrigerate. They will last in the fridge for up to 5 days.
- You can also make these crepes in advance and freeze them for up to 2 months. When ready to serve, thaw crepes in the refrigerator and reheat in a microwave until heated through.
Nutrition Information
Notice: Nutrition is auto-calculated for your convenience. Where relevant, we recommend using your own nutrition calculations.
